Are you trying to add a header or footer in Google Docs or trying to stylize them?
For many beginners, it is not very obvious how to add header or footer areas to a document in Google Docs. It is also not very clear how you can stylize them.
In this article, I’ll show you how to easily add headers or footers in Google docs and how to stylize them.
Here are the topics we will cover in this guide:
How To Add A Header & Footer to a Document in Google Docs:
To add a header in a document in Google Docs, go to the Insert > Headers & Footers > Header or press CTRL+ALT+H+O keys on your keyboard.
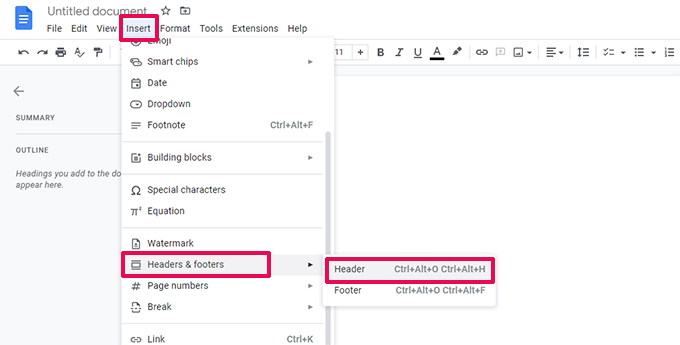
Google Docs will now insert a header section to your document.
Repeat the same steps to insert a footer from Insert > Headers & Footers > Footer or by pressing CTRL+ALT+O+F keys on your keyboard.
Adding Page Number to Header or Footer in Google Docs
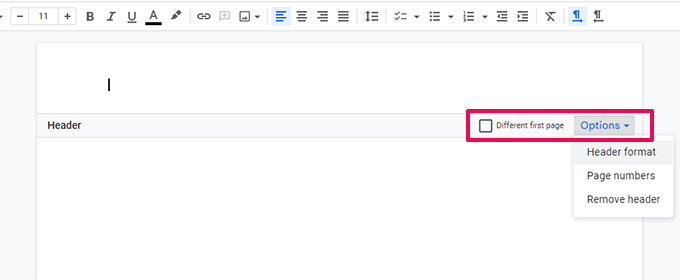
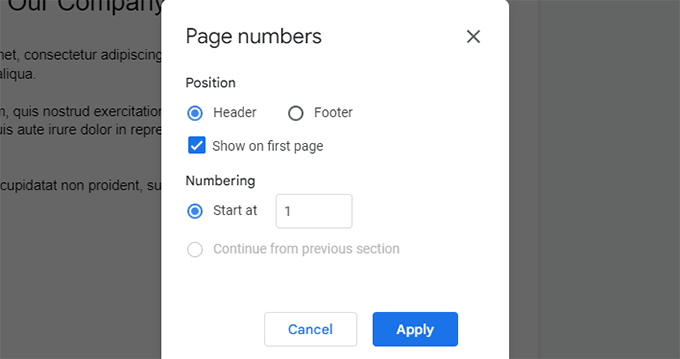
Click to select the header or footer area and then click on the Options drop-down menu. From here, you need to click on the Page numbers menu.
This will bring up a popup where you can adjust how you want to display page numbers in your document.
Adding a Different Header or Footer for The First Page of a Document
When you add a header or footer area to your document you will see the option to check ‘Different First Page’ checking this option will allow you to set a different header or footer area for the first page of your document.
How to Add Background Color to Header or Footer in Google Docs
The easiest way to set the background color for the header or footer area in Google docs is by adding an image and setting it as the background.
Using this hack you can also set a solid color background for your header or footer or use any image as background.
Simply use any image editor (Photoshop, Microsoft paint, or open source free alternative Gimp) and create a blank image of at least 1200px width and 100px height.
Now you can use the paint tool in your image editor to fill the image with the background color that you want to use.
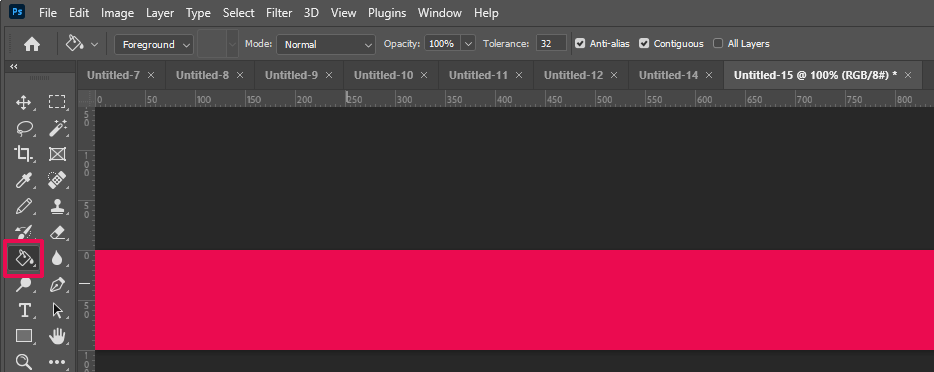
You can now save this image to your computer.
After that, switch to your document in Google Docs and select the header or footer area. After that, click on the image icon to insert the image you created earlier.
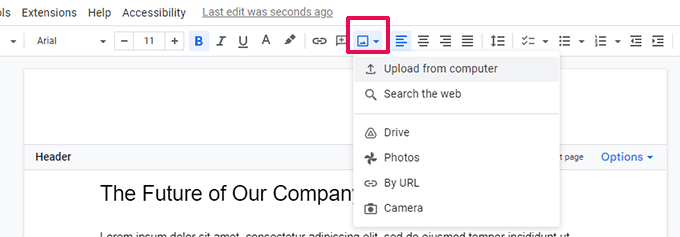
After inserting the image you need to adjust the image settings to make it occupy the full width and height of the header/footer area.
You also need to set the image style to be displayed ‘Behind Text’.
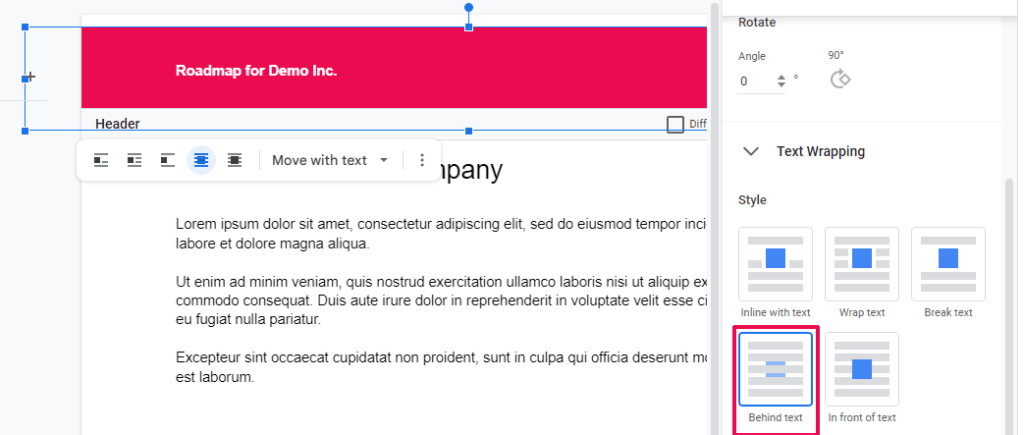
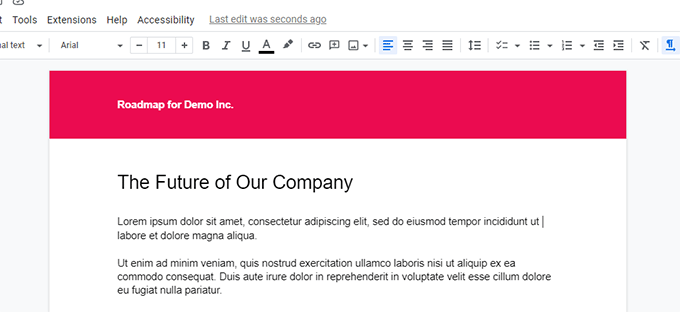
Once you have set the colored background for the header in Google docs you can adjust the header or footer margins to 0px. This will allow the image to fill in the header area.
Here is how it will look in your document.
I hope this article helped you learn how to easily add header and footers to your documents in Google Docs.
Comment Summary
No comments available.
